Windows 365 has been released to the public, and even though it is not yet a service for individuals, the threshold for dealing with it has been lowered.
In my case, I am very attracted to the fact that I can run Intel Windows from my M1 Mac, but I have one question.
As mentioned in the title of this article, how can I transfer data to and from my local computer with Windows 365?
Since I signed up for Windows 365 for verification, this article will explain the method while actually touching Windows 365.
File sharing is not possible when accessing Windows 365 from a browser.
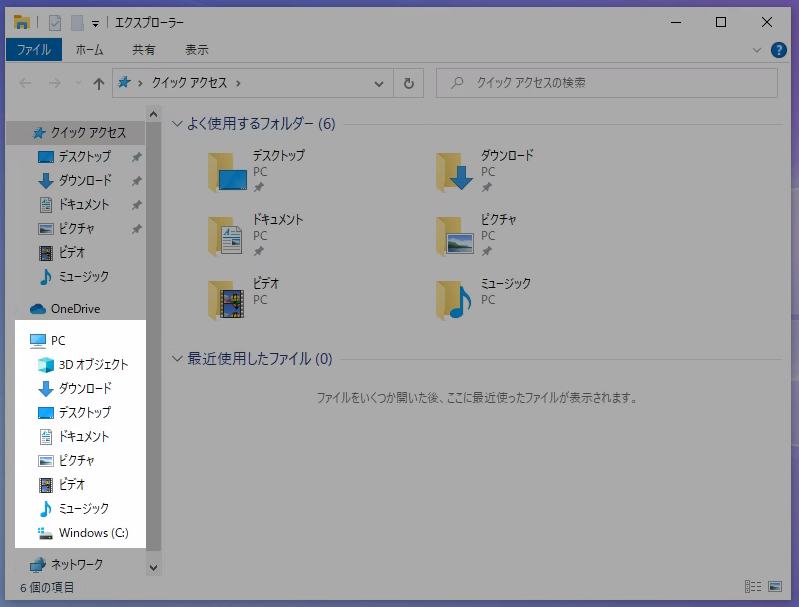 ▲Explorer screen on Windows 365. There are no shared folders.
When you log in to the top page of Windows365, a screen called “Your Cloud PC” appears, and a list of your subscriptions is displayed.
There is a button called “Open in Browser”, and I thought the normal way to use it was to access Windows365 from there, but I couldn’t share folders in this way even though I tried various ways.
(*If you know how to do this, please let me know on the contact page)
(*If you know how to do this, please let me know on the contact page) In the first place, when you access from a browser, there is often a delay in the description.
【Recommended】 Using Remote Desktop
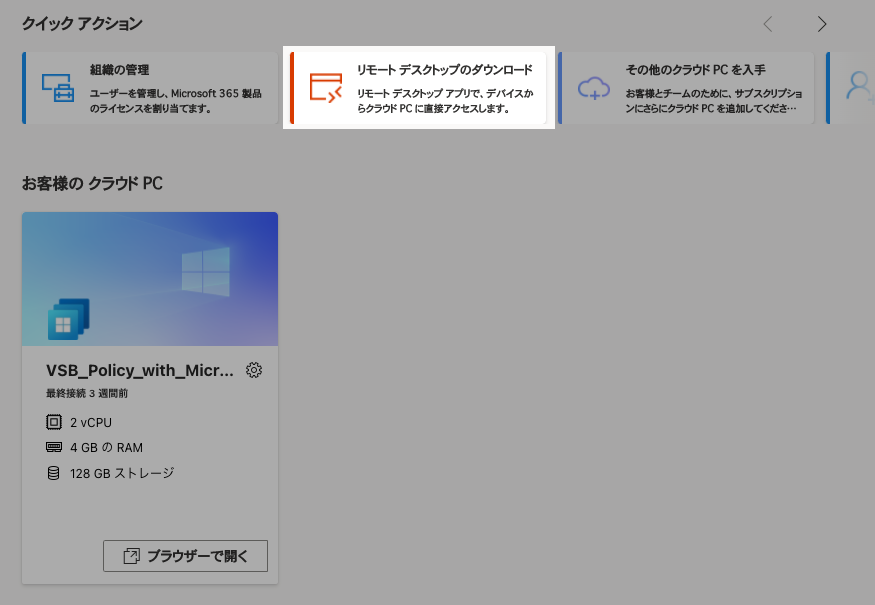 ▲There is also a Remote Desktop guide on the top page of Windows365.
As far as I have verified, I was able to share files easily by using Remote Desktop.
Also, using Remote Desktop facilitates the use of the keyboard, so I recommend using this application if you are considering using Windows 365 in the future.
Install Remote Desktop
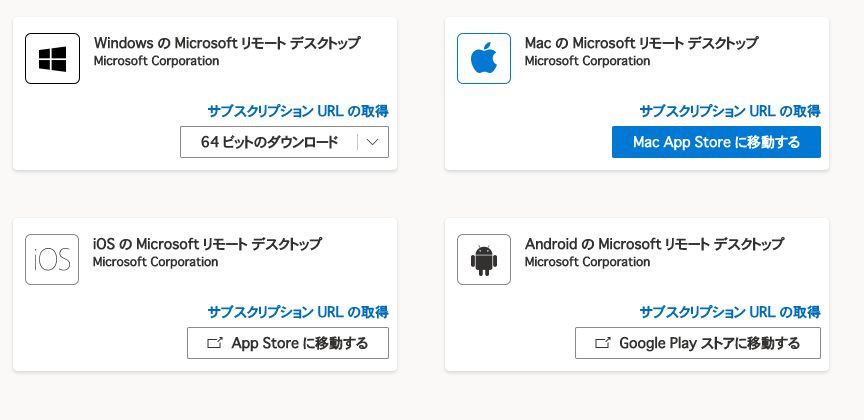
Remote Desktop is available for a variety of devices. Since we will be connecting from an M1 Mac, we will download it from the Mac App Store.
Click here for the Mac App Store download link.
 ▲Remote desktop with support for a variety of devices
Adding Windows 365 to Remote Desktop
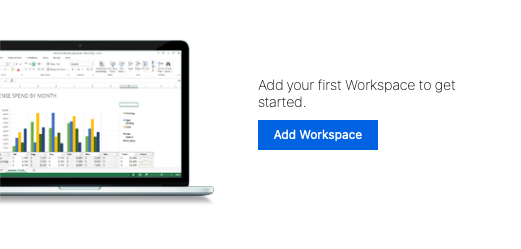
You can add a PC to Microsoft Remote Desktop, or you can add a “Workspace”.
First, to register Windows 365 to Remote Desktop, issue a special URL from the administration screen.
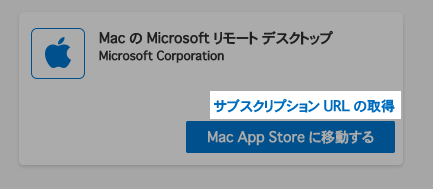
Select the “Get Subscription URL” button to copy a special URL that can be registered to Remote Desktop.
Next, go back to Remote Desktop, select the “Workspaces” tab, and then select the “Add Workspace” button.
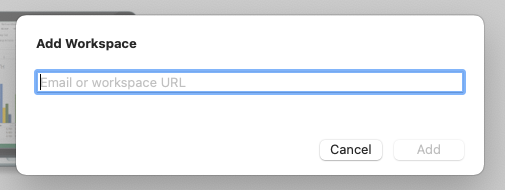
Then a screen for pasting the URL of the Workspace will appear, so paste the subscription URL that you just obtained. When the search is successfully completed, the “Add” button will be enabled, so click on it.
Since you will be asked to log in to Windows 365, log in with the Microsoft account that you have subscribed to for Windows 365.
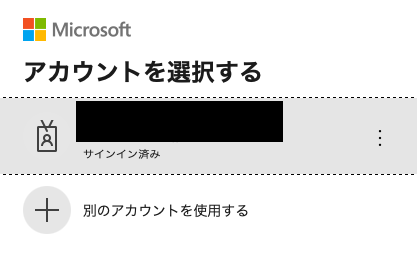 ▲Normally, the account you are logged into will be displayed like this, so you only need to select the account.
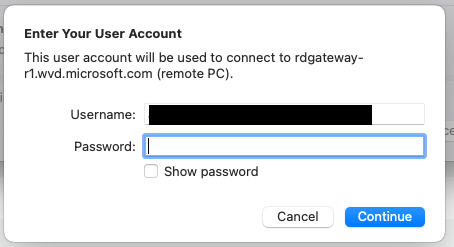
Once it is successfully added, the Windows 365 computer that you have subscribed to will be displayed in the Workspaces tab. If you continue to select the computer, you will be asked to sign in to your account, and by logging in, you can start Remote Desktop.
Turn on file sharing on Remote Desktop.
You can continue to use Remote Desktop to operate the Windows 365 computer, but the purpose of this project is to share files with Windows 365.
Enable file sharing from the preferences. First, open Preferences from the menu of Remote Desktop (Microsoft Remote Desktop).
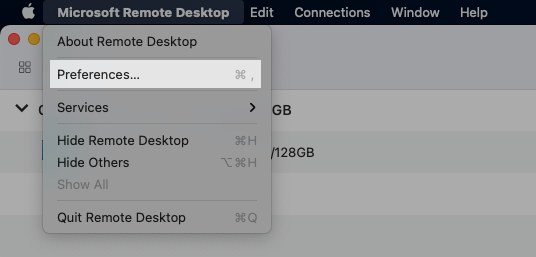
If you look at the “General” tab, where it says “If folder readirection is enabled …”, it probably defaults to “Nothing”. In the “General” tab, look at the part that says “If folder readirection is enabled …”, which is probably set to “Nothing” by default.
Select the folder you want to share in this section. When you select a folder, select the part that says “Nothing”, and then select “Choose Folder…”. and select the folder you want to share.
In my case, I’ll share the desktop.
 After setting this up, I connected to my Windows 365 computer from Remote Desktop again, and checked Explorer….
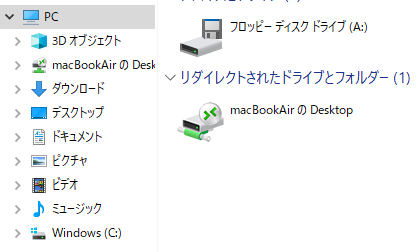
The desktop of the M1 Mac I’m operating is showing up in Explorer! File sharing is now possible.
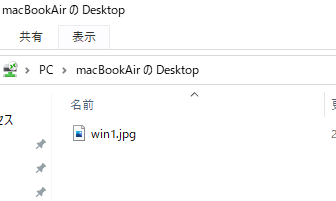
▼You can see that the files have been shared successfully.
conclusion

I’ve been wanting to try this for a long time, and I introduced a way to share files between M1 Mac and Windows 365.
You can easily share files by using Microsoft’s Remote Desktop Service and selecting the folders to share in the preferences.
There are a few other questions about Windows 365 that I will cover in other articles.
I am Japanese, and my computer is set up in Japanese. So there may be some differences in the names of the buttons and windows.
I try to keep the information on this site (tamocolony) up-to-date, but please be aware that the information on this site may not be the most up-to-date, or the information itself may be incorrect. We take no responsibility for the content of this site. If you have any questions about an article or need to make corrections, please contact us via the Contact Us page.